10 Common 3D Printing Fails & How to Fix Them Like a Pro
Nothing’s more frustrating than watching your 3D printer turn hours of hard work into a tangled mess of melted plastic. These 3D printing fails can leave you feeling defeated, especially when you’re not sure what went wrong. And the worst part? It always seems to happen right when you’re finally getting into a groove. You’re not in this alone. And better yet, you’ve got options. Most common failures have simple fixes once you know what to look for. In this guide, we’ll break down the biggest problems and show you how to solve them like a seasoned pro.
1. Warping
What Causes It
The first on our list of 3D printing fails is warping. Warping is when the edges of your print curl up and detach from the build plate. This happens when the lower layers cool quicker than the upper layers, resulting in tension.
How to Fix Warping
- Use a heated bed. Start around 60°C for PLA, 100°C for ABS.
- Apply bed adhesives. A layer of glue stick or hairspray works wonders.
- Enclose your printer. This keeps the ambient temperature stable.
- Switch filaments. PLA is less prone to warping than ABS.
Warping is annoying, but with the right bed temperature and adhesion method, it’s totally avoidable.
2. Layer Shifting
What Causes It
Have you ever printed something that looked incredible until you discovered that sections were misaligned halfway through? That is layer shifting. It is mainly caused by mechanical or motion concerns.
How to Prevent It
- Tighten belts and pulleys. Loose parts cause inaccurate movements.
- Check rail lubrication. Dry or dirty rails can cause jerky motions.
- Avoid accidental bumps. Even a small nudge can shift layers.
- Reduce speed. Fast prints can shake the printer if it’s not solidly built.
A well-calibrated and secure printer keeps your layers in line.
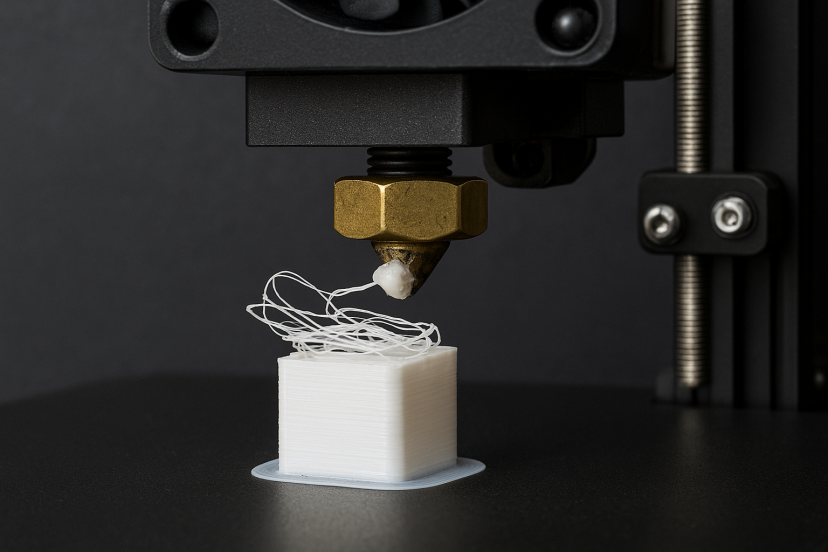
3. Stringing
Common Triggers
Stringing creates wispy, hair-like strands between different sections of a print. This usually happens when the nozzle oozes filament while moving.
Easy Fixes
- Enable retraction. Most slicers have this setting—turn it on!
- Lower print temp. A slightly cooler nozzle (try -5°C) reduces oozing.
- Increase travel speed. Faster nozzle movement gives less time for stringing.
- Dry your filament. Moisture can cause inconsistent extrusion.
A few slicer tweaks and dry filament go a long way.

4. Under-Extrusion
Under-extrusion leads to weak prints with gaps, missing layers, or brittle walls.
What to Do
- Check for partial nozzle clogs. Run cleaning filament or use a needle.
- Increase flow rate or extrusion multiplier. Try small increments (1–2%).
- Ensure filament feeds smoothly. Tangled spools or bad gears are common culprits.
- Print slightly hotter. A warmer nozzle helps filament flow better.
Sometimes, just replacing old filament with fresh, dry material solves the problem instantly.
5. Over-Extrusion
Over-extrusion causes blobs, zits, or layers that look like they’re smearing together.
Your Fix List
- Calibrate your E-steps. This ensures your printer feeds the exact right amount.
- Check filament diameter. Set your slicer to match (usually 1.75mm).
- Reduce flow rate slightly. Drop it by 2–5% and re-test.
- Dry filament. Yep—wet filament strikes again.
An overfed printer is just as bad as one that starves.
6. First Layer Not Sticking
Many 3D printing fails start with a bad first layer. If it doesn’t stick, the rest doesn’t stand a chance.
Fix It Like a Pro
- Re-level the bed. Use a sheet of paper to check the nozzle gap.
- Adjust Z-offset. Lowering the nozzle ever so slightly often solves the issue.
- Clean the bed. Finger oils, dust, and leftover adhesive can cause problems.
- Print slower and hotter for the first layer. Speed around 20–30mm/s and slightly higher temps work well.
PLA likes a clean, level bed. Don’t skip this step—it’s the foundation of everything.
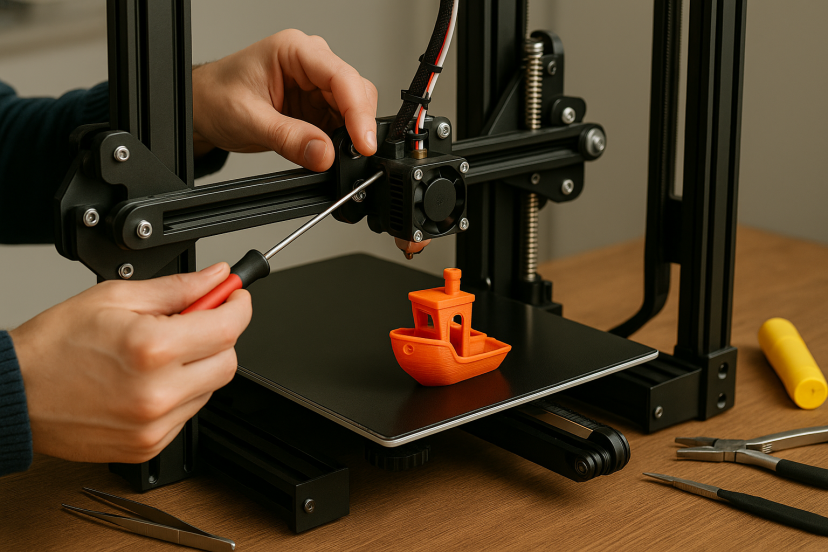
7. Nozzle Clogging
Nozzle clogs can range from partial blockages to complete stoppage.
Prevention & Fix
- Use high-quality filament. Cheaper ones have inconsistent diameters or debris.
- Clean the nozzle regularly. Cleaning filament or brass brushes help.
- Don’t let filament sit hot for too long. Heat creep can carbonize it.
- Try the “cold pull” method. Heat up, insert nylon filament, cool down, then pull to remove clogs.
Keep your nozzle clean, and your printer will reward you with smoother prints.
8. Ghosting/Ringing
Ringing creates ripple patterns, usually visible around corners or lettering.
Cut It Down By
- Lowering the print speed.
- Tightening belts. Loose belts let the print head wobble.
- Adding vibration dampers. On stepper motors, these reduce mechanical noise.
- Printing on a stable surface. A shaky table magnifies ghosting.
Ringing is cosmetic, but it’s worth fixing if you want clean, sharp prints.
9. Gaps in Top Layers
If you see infill showing through the top of your model, that’s a sign of too few solid layers or poor overlap.
How to Fix It
- Increase top solid layers. 6–8 is the sweet spot.
- Use 100% infill for critical layers. Especially for lids or flat surfaces.
- Raise extrusion temp. Better layer fusion reduces gaps.
- Slow the print slightly. Better control means better coverage.
No one wants a Swiss cheese finish.
10. Poor Bed Adhesion
This is more than just the first layer. If parts detach midway through the print, you’ve got adhesion issues.
Solutions
- Use adhesive aids. Magigoo, hairspray, glue stick—pick your favorite.
- Switch bed surfaces. PEI sheets or textured glass work wonders.
- Try a raft or brim. These increase surface contact.
- Keep airflow off. A drafty room is the enemy of adhesion.
Combine these with a good first layer setup, and you’re golden.
Scientific Insights That Support Smarter 3D Printing
If you’re wondering whether these 3D printing fixes are just guesswork, rest assured, they’re grounded in science. A 2023 study on process parameters in material extrusion confirmed that adjusting settings like layer height, temperature, and speed has a significant impact on print quality and strength.
Additionally, a comprehensive review of common 3D printing challenges categorized the most frequent failures and offered proven solutions, from optimizing slicer settings to improving thermal management. These findings back up what seasoned makers already know—better prints start with better understanding.
Recommended 3D Printing Tools & Products
Need some backup in your print lab? These handy tools and accessories can make a huge difference when it comes to avoiding frustrating 3D printing fails and keeping your workflow smooth:
3D Printer Tool Kit with Cleaning Needles and Tweezers – A go-to kit for quick fixes, nozzle cleaning, and safe part removal.
Creality Glass Bed for Better Adhesion – Provides a flat, durable surface that helps your prints stick better—especially those tricky first layers.
Magigoo Original Adhesive for Easy Bed Adhesion – This glue-like solution boosts bed adhesion and makes removing prints a breeze once they cool.
eSUN 3D Printer Filament (PLA+) – Reliable, high-quality filament with improved strength, smoother extrusion, and less stringing.
Nozzle Cleaning Kit with Drill Bits and Wires – Tackle stubborn clogs with precision tools that keep your nozzle clear and printing cleanly.
Conclusion
Don’t let a spaghetti mess or warped edge defeat you. Take a breath, assess what went wrong, and fix it. That’s how pros are made—through patience, practice, and a whole lot of trial and error. Once you’ve mastered the basics, it’s amazing what you can create. Every one of these 3D printing fails brings you closer to understanding your machine, your materials, and your process. From practical models to expressive, boundary-pushing designs, check out some inspiring 3D printed art projects that show just how far your skills can take you. The more you learn, the better your results. And soon, you won’t just be printing—you’ll be creating with confidence.
FAQs
1. What is the most common 3D printing issue?
Bed adhesion is by far the most common. If the first layer doesn’t stick, the whole print is at risk.
2. How can I tell whether my nozzle is clogged?
You might see clicking from the extruder, weak extrusion, or nothing at all coming out. Try a cold pull or cleaning needle.
3. Should I re-level the bed before every print?
Ideally, yes—especially if your printer doesn’t have auto bed leveling. It’s a quick step that saves time in the long run.
4. Can humidity really ruin my prints?
Absolutely. Filament absorbs moisture, which causes bubbling and weak layers. Store filament in a dry box or airtight container.
5. What slicer settings should I change first when fixing stringing?
Start with retraction distance and speed, then tweak temperature and travel speed.