Clear 3D Print Trick Tips: Proven Methods To Master Transparency
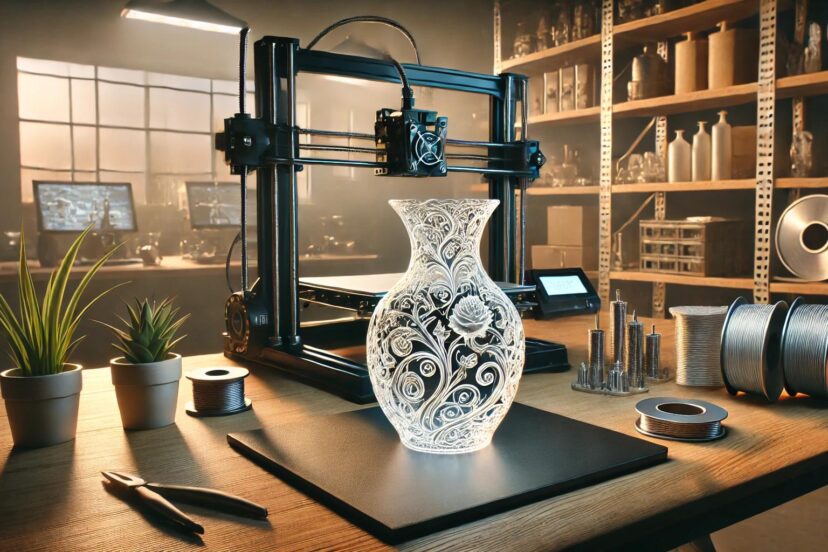
3D printing is fantastic and exciting. Not until frustration creeps in as you start printing cloudy, far from crystal clear objects. You’re not alone! Printing transparent materials is super challenging. So, how do you craft transparent prints easily? Let’s unpack some clear 3d print trick tips that’ll bring your transparent prints to life, sharper and clearer than ever. Let’s get into it!
Choose the Right Filament
Number one of our clear 3d print trick tips is choosing the right filament for your project. Okay, so if you want to achieve those glass-like prints, you must use the right filament for the job. PLA, PETG, and Polypropylene are the best options here. I recommend using PETG because it’s more suitable for reaching clearer, transparent prints than PLA. Opt for a high-quality, clear filament for best results. Take my word for it!
Keep Your Nozzle Clean
Next stop, the Nozzle. Your printer’s nozzle should be clean because a dirty one will surely mess with your creation. It’s like painting using a brush coated in old, dried paint with lots of mess. You should clean it to avoid residue that can muddle the pristine finish. Make it a habit to inspect and clean your nozzle regularly.
Adjust Print Settings for Transparency
Settings are also crucial and small adjustments make all the difference. Want to create a smooth, cohesive look? Well then, lower your layer height to around 0.1 mm or less to reduce those visible layer lines. Adjust the settings like nozzle temperature, infill, and flow rate (to 100%), and even turn off the cooling fan because it makes the print cloudy.
Print Slower for Better Quality
In a hurry? No? Good, then print SLOWLY. Speed doesn’t promise better print quality. Sometimes, clarity demands patience. Slow your printer’s speed down to about 20-40 mm/s and give the material the time it needs to settle perfectly. Just trust the process, folks!
Control Your Cooling Fans
Cooling is a little bit tricky when it comes to clear prints. Too much and you risk cloudiness. So, to save you from a lot of headaches in the future, do this: Adjust the fan speed or turn it off for a few layers. Trust me, it can work wonders in keeping the transparency intact. But it’s a trial and error until you find that cooling sweet spot.
Use a Heated Bed
A heated bed is a bit like pre-warming your skillet before cooking—it just makes everything smoother. Set your bed temperature to the filament’s sweet spot (for PETG, around 70-80°C) to avoid pesky warping and ensure better adhesion.
Minimize Infill
When it comes to transparent prints, less is definitely more. There’s no need for a higher infill percentage. Lower your infill density between 0-10% because it can enhance light passing through your print, giving it that beautiful, almost ethereal clarity. Thinking of the pattern? Try honeycomb. It can add strength without too much density, creating an effect like sunlight filtering through leaves.
Adjust the Wall Thickness
Adding a little extra to your wall thickness—say, setting it to at least 1.2 mm—can increase light transmission, enhancing the clear effect. Thicker walls may just be the subtle boost that your print needs for that glassy, uninterrupted shine.
Experiment with Extrusion Multiplier
Tweaking your extrusion multiplier (or flow rate) can be like fine-tuning an instrument. Adjusting it slightly to around 95-98% can prevent excess filament buildup, helping you achieve a smoother, clearer print.
Maintain Optimal Temperature Settings
Let’s not forget one crucial part and one of the clear 3d print trick tips… the temperature. Yes. Temperature is everything in the world of clear prints! Higher temperatures can improve layer bonding, which translates to fewer visible lines. For PETG, try setting the temperature between 230-250°C. Just be careful, as going too high can result in yellowing or bubbling.
Research Insights on 3D Printing Post-Processing
Recent studies have highlighted the importance of post-processing techniques in enhancing the transparency and surface quality of 3D-printed polymers. One comprehensive review on ResearchGate discusses various post-processing methods, such as sanding, polishing, and chemical treatments, which significantly improve the clarity of printed materials (Post-Processing of 3D printed Polymers). Additionally, a collection of articles on Taylor & Francis Online explores the effects of different treatments on polymer performance, showcasing the advancements in achieving clear, smooth results (Post-Processing Treatments). These findings emphasize that post-processing is a critical step for anyone aiming for crystal-clear 3D prints.
Post-Processing for Crystal-Clear Results
Post-processing is like adding a final coat of polish to a fine piece of furniture—it can elevate your work from good to jaw-dropping. Here’s how:
- Sanding: Start with coarse sandpaper (around 400 grit) and work your way up to finer grades like 2000 grit for a glassy finish.
- Polishing: Use a clear plastic polish or automotive compound to add that extra sparkle.
- Heat Treatment: A gentle pass with a heat gun can soften surface imperfections, but handle it with care—too much heat, and your print could warp.
Recommended Products for Clear 3D Printing
- Best Transparent Filaments
- OVERTURE Transparent Filament: High clarity and consistent quality.
- SUNLU Transparent PLA: Easy to use with good transparency.
- PolyMaker Polycarbonate Transparent: Strong and durable with excellent clarity.
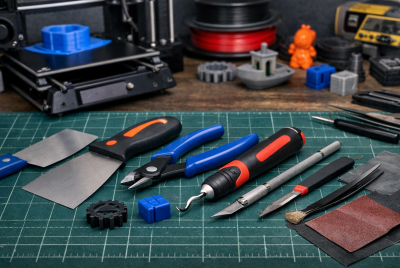
- Essential Post-Processing Tools
- 3M Wet/Dry Sandpaper Assortment Pack: Ranges from 400 to 2000 grit for gradual smoothing.
- Novus Plastic Polish Kit: Ideal for polishing 3D prints to a clear finish.
- Heat Gun: Adjustable temperature settings for heat treatment.
- Storage and Maintenance
- PrintDry Filament Dryer: Keeps filament dry and ready for use.
- Silica Gel Packets: Essential for filament storage to prevent moisture buildup.
- Nozzle Cleaning Kit: Ensures a clean nozzle for optimal print clarity.
- 3D Printer Accessories
- Vibration-Dampening Feet: Reduces printer vibrations for smoother prints.
- Direct Drive Extruder Kit: Improves extrusion control for clearer layers.
- Flexible Build Plate: Assists in removing delicate clear prints without damage.
Avoid Moisture in Filament
Humidity can be a nightmare for clear filament, introducing unwanted cloudiness. Always store your filament in a sealed, dry container with desiccant packs, or dry it out in a filament dryer if needed.
Use Transparent Coatings
For that final “wow” factor, a transparent coating like clear acrylic spray or resin can add depth and shine to your print. This trick works wonders, especially for decorative items that need a polished finish.
Optimize Print Orientation
Sometimes, it’s all about perspective. Printing with fewer overhangs and more vertical walls reduces visible lines, improving transparency. It’s a bit like a photographer finding the perfect angle for the clearest shot.
Level Your Bed Properly
An even bed is foundational for any successful print, but it’s especially true for transparent ones. Regularly check your bed leveling to avoid imperfections that could throw off your clarity game.
Choose the Right Slicer Settings
Your slicer software holds many hidden tricks for clear prints. Try “spiralize outer contour” (also known as vase mode) for single-wall transparency, and don’t be afraid to experiment until you find settings that align with your vision.

Use High-Quality 3D Models
High-quality, simple designs are best for clear prints—excess detail can create shadows that break the transparency. Aim for smooth surfaces and minimal intricacy for optimal results.
Reduce Vibration and Movement
Too much vibration can compromise print quality. Ensure your printer is stable—dampening feet or a vibration mat can help reduce movement and keep your print smooth.
Use a Direct Drive Extruder
A direct drive extruder offers more precise control, which can make a difference in achieving that clear, uniform extrusion. If you have the option, consider upgrading.
Monitor Your Prints
Transparent prints are a labor of love—don’t be afraid to keep a close eye on your work. Small adjustments mid-print can make the difference between “almost there” and a masterpiece.
Keep Your Printer Maintained
As with anything, maintenance is key. Clean your nozzle, check for any worn parts, and keep everything in top shape. A well-maintained 3D printer rewards you with quality results every time.
Conclusion
Transparent 3D printing is challenging but when with small tweaks here and there, you’ll achieve that glass-like finish. Start by choosing the right filament like PLA or PETG. Check the nozzle, infill, temperature, and adjust the settings for the best results. Don’t forget post-processing and make your masterpiece shine! Don’t stress if anything goes wrong. Be patient, follow these clear 3d print trick tips, and trust the process. Remember, each print is a step closer to mastering this unique craft.
FAQs
- Why do my clear prints look cloudy?
It could be because of moisture in the filament, excessive cooling, or unsuitable settings could be the culprit. - What filament works best for clear prints?
PETG is the best option for transparent prints. Polycarbonate and some types of clear PLA can also yield great results. - How can I make my clear prints smoother?
Sanding with progressively finer sandpaper, followed by polishing and heat treatment, enhances smoothness and transparency. - Is higher temperature always better?
Higher temperatures can improve bonding, but going too high may cause bubbling or discoloration. Stick to the recommended range. - Do I need special tools for post-processing?
Basic tools like sandpaper and clear polish are enough for most post-processing. For advanced techniques, filament dryers or rotary polishers may be helpful.


