How to Sand 3D Prints and Remove Layer Lines
Even a successful print can look unfinished when light catches every layer line. That texture comes with FDM printing, but it does not have to define the final piece. Learning how to sand 3D prints helps you create smoother props, miniatures, enclosures, display models, and practical parts. The method is simple: remove obvious defects, level the ridges, fill deep grooves, and refine the surface with progressively finer abrasives. The real skill is knowing when to sand and when to fill. Too little work leaves visible lines. Too much can soften details, round edges, or expose the infill.
Why 3D Prints Have Layer Lines
FDM printers build objects by depositing melted filament one layer at a time. Each layer creates a small ridge, especially on curved surfaces, slopes, and rounded edges.
Layer height, extrusion width, print orientation, speed, and temperature all affect the final texture. Research comparing physical measurements with human perceptions of 3D-printed surfaces found that thicker layers and wider extrusion lines generally create rougher finishes.
Using a smaller layer height can reduce visible ridges and shorten the sanding process. However, even a finely printed model may still need light finishing before painting or display.
Tools and Materials You Will Need
Before learning how to sand 3D prints, gather the right tools so you can work safely and avoid damaging small details. Prepare these basics before sanding:
- Flush cutters or a hobby knife
- Needle files
- Wet/dry sandpaper
- A small sanding block or flexible sponge
- Water with a drop of dish soap
- Compatible spot putty
- Filler primer
- Safety glasses, gloves, and suitable respiratory protection
Work in a ventilated area. Dry sanding creates plastic dust, while fillers and primers may release fumes. Always follow each product’s safety label.
What Sandpaper Grit Should You Use?
Choose your starting grit based on the print, not a fixed rule.
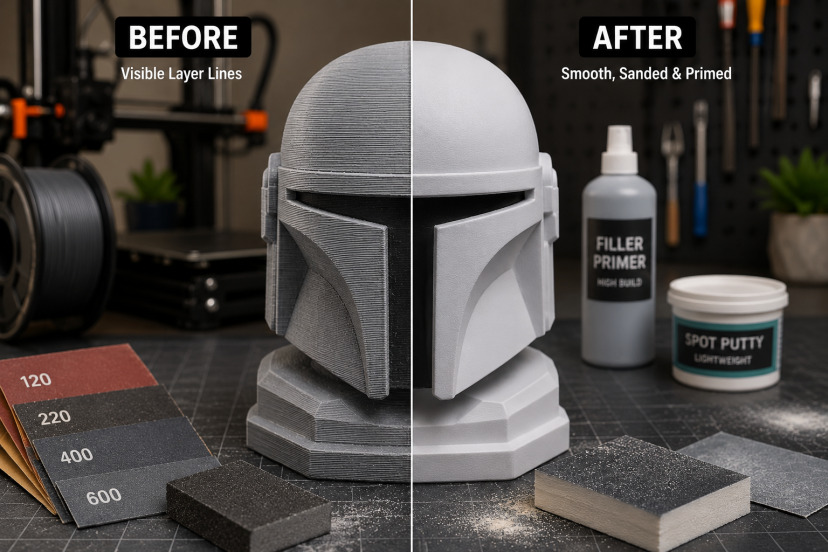
Use 120 or 180 grit for heavy support marks and strong ridges. Start at 220 or 320 if the model already looks clean. Progress to 400- and 600-grit sandpaper before applying paint. For a polished finish, continue through 1000, 1500, or 2000 grit.
A reliable PLA sequence is:
180 → 240 → 320 → 400 → 600
Do not jump straight from coarse paper to ultra-fine paper. Fine grit takes too long to remove deep scratches left by an earlier stage.
How to Sand 3D Prints (A Step-by-Step Guide)
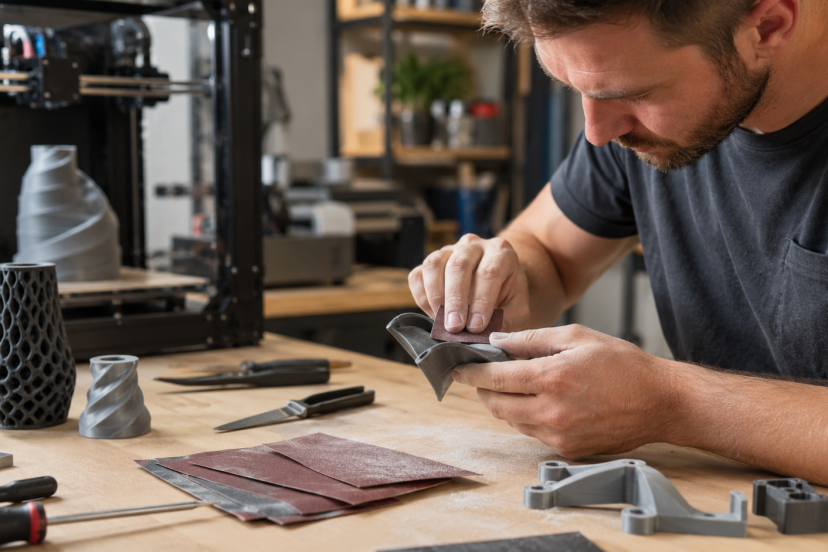
Understanding how to sand 3D prints comes down to using light pressure, moving through the grits gradually, and checking the surface often.
1. Remove Supports Carefully
Clip away supports without cutting into the model. A small needle file works well around holes, corners, seams, and tight recesses.
Inspect the print under bright side lighting. Shadows reveal raised lines, dents, and leftover support marks better than normal overhead light.
2. Level the Main Ridges
Wrap coarse paper around a small sanding block for flat surfaces. The block spreads pressure evenly and helps preserve straight edges.
Use short, controlled strokes and rotate the part often. Sand across the layer lines when possible. On curved surfaces, follow the shape instead of grinding one spot until it becomes flat.
PLA softens when friction creates heat. Use light pressure and pause when the surface feels warm. High-speed rotary tools can melt or gouge plastic quickly, so practice on a failed print first.
3. Find and Fill Low Spots
Wipe away the dust and inspect the print under side lighting. Deep grooves or shiny patches often show where sanding has not reached.
Instead of removing too much plastic, fill these areas with a thin layer of spot putty and sand it smooth with 220- or 320-grit paper.
An in-depth review of additive manufacturing post-processing notes that sanding can struggle around recesses and complex details. Needle files, filler, and primer can help smooth areas that sandpaper cannot reach easily.
4. Progress Through Finer Grits
Once the major ridges disappear, move through the remaining grits. Clean the part between stages so stray coarse particles do not scratch the surface.
At this point, stop trying to reshape the model. Your goal is to replace deep scratches with a finer, more consistent surface pattern.
Use fresh sandpaper whenever a sheet becomes clogged or loses its cutting ability. Worn-out paper creates extra heat without smoothing the surface effectively.
5. Wet Sand the Final Stages
Wet sanding works well from roughly 400 grit upward. Dip waterproof paper into water mixed with a small drop of dish soap, then sand gently.
Water carries away debris, reduces clogging, and limits friction heat. However, avoid wet sanding parts that contain electronics, uncured filler, or cavities that cannot dry properly.
Rinse the model and let it dry completely before applying primer.
6. Prime, Inspect, and Repeat
Apply several light coats of filler primer rather than one heavy coat. Spray outdoors or in a properly ventilated workspace and follow the label directions.
Primer fills very small scratches and makes flaws easier to spot. Once it dries, sand with 400 or 600 grit. Repeat the prime-and-sand cycle only where layer lines remain.
This combined approach works because each material has a job:
- Sandpaper lowers raised ridges.
- Putty fills deep grooves.
- Primer reveals inconsistencies.
- Fine sanding prepares the surface for paint.
Tips for PLA, PETG, ABS, and Resin
Each printing material behaves differently during sanding. Adjust your technique instead of treating every print the same.
PLA
PLA sands well by hand but warms quickly. Use light pressure and wet sand during the finer stages.
If the plastic starts to feel soft or sticky, stop and let it cool. Adding more pressure often makes the issue worse.
PETG
PETG may feel gummy and clog the paper. Use fresh sheets, gentle pressure, and filler primer when sanding alone becomes slow.
You may need to replace or clean the abrasive more often than you would with PLA.
ABS
ABS usually sands cleanly, although heat can still distort thin areas. Hand sanding gives most hobbyists more control than aggressive mechanical or chemical smoothing.
Pay close attention to thin walls, corners, and narrow details.
Resin
Fully wash and cure resin prints before sanding. Resin dust is extremely fine, so use the protection recommended by the resin manufacturer and wet sand when allowed.
Never sand uncured resin. It can spread across your tools, workspace, and skin.
Common Sanding Mistakes to Avoid
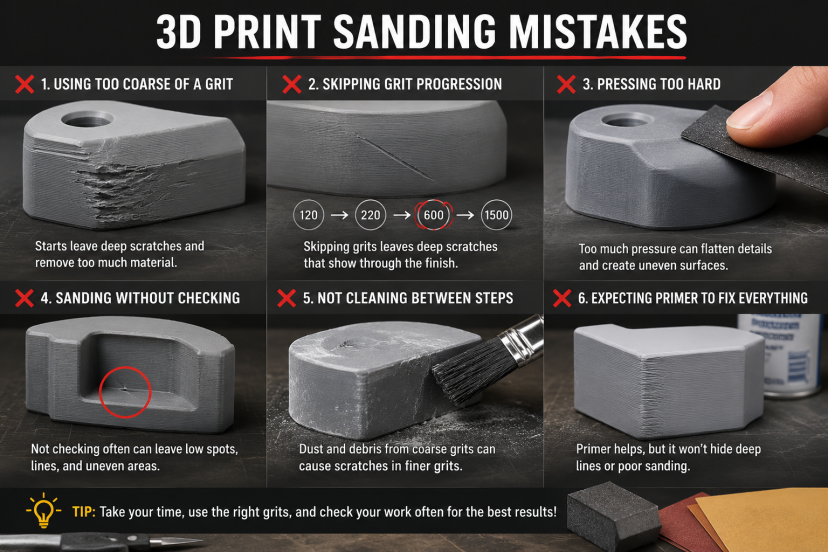
Starting too aggressively causes many finishing problems. Very coarse paper can erase lettering, round sharp corners, and expose infill.
Other common mistakes include:
- Skipping too many grit levels
- Sanding one area for too long
- Applying primer over sanding dust
- Using thick filler coats
- Pressing harder when the plastic becomes warm
- Expecting primer to hide major ridges
Primer works best on fine scratches and tiny imperfections. It cannot replace proper leveling or fill deep layer gaps by itself.
Be especially careful with functional parts. Sanding changes dimensions, so test-fit lids, hinges, clips, and sliding joints often.
That matters when finishing projects such as 3D-printed storage boxes, where a small dimensional change can affect the way drawers, dividers, or lids fit.
Conclusion
Knowing how to sand 3D prints turns visible layer lines into a manageable finishing task. Start with the least aggressive grit that works, progress gradually, and fill deep grooves instead of removing too much plastic.
Use wet sanding to control heat during the finer stages, then apply primer to reveal anything you missed. Patience wins here. Several light finishing passes will usually create a cleaner result than one rushed session with coarse paper.
FAQs
What grit sandpaper should I use first on a 3D print?
Start with 180 or 220 grit for noticeable layer lines and support marks. Begin at 320 grit if the print already has a fairly smooth surface.
Should I wet sand PLA prints?
Yes. Wet sanding during the finer stages can reduce heat, control dust, and prevent the sandpaper from clogging. Let the part dry completely before priming or painting.
Can sanding remove every layer line?
Sanding can remove or hide most layer lines. However, deep grooves often need putty or filler primer because sanding alone may remove too much plastic or damage small details.
Can I use a power sander on a 3D print?
A power sander may work on large, thick, flat parts, but it removes material and creates heat quickly. Hand sanding gives you better control over most hobby prints.
Do I need to apply primer after sanding?
Not always. Primer becomes valuable when you plan to paint the model or need to reveal remaining scratches. Filler primer can also reduce tiny imperfections left after fine sanding.