How 3D Printing and 3D Scanning Work Together
What if you could take a real object, turn it into a digital model, and then print a new version of it? That is exactly where 3D printing and 3D scanning work best together. A 3D scanner captures the shape of an existing item, while a 3D printer brings that digital design back into the physical world. This process can help you copy parts, repair broken pieces, customize objects, and improve prototypes faster. In this guide, you’ll learn how both technologies connect, how the scan-to-print workflow works, and what you need to know before starting your own project.
What 3D Printing and 3D Scanning Actually Do
Before looking at the workflow, it helps to separate the two jobs.
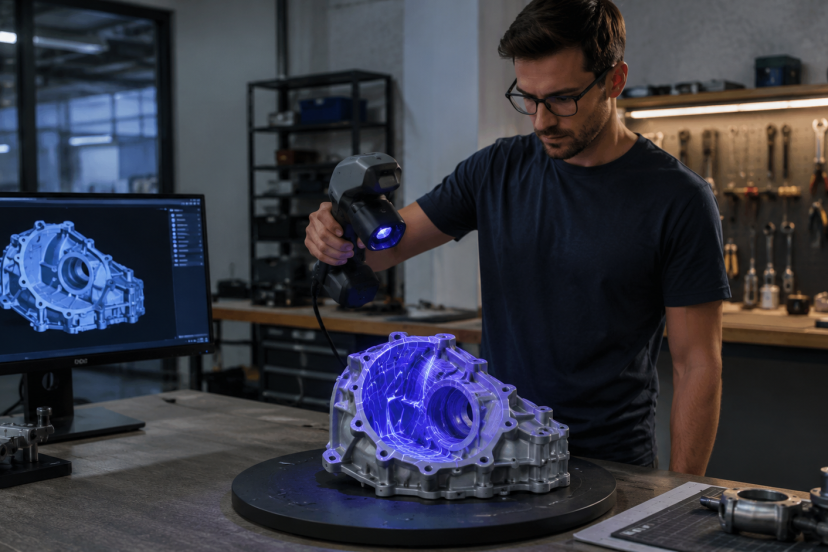
3D Scanning Captures the Real Object
A 3D scanner collects surface data from an existing object. Depending on the scanner, it may use structured light, laser scanning, photogrammetry, infrared sensors, or LiDAR.
The scanner creates a digital shape, usually as a point cloud or mesh. That mesh often becomes an STL, OBJ, or PLY file.
In simple terms, the scanner answers this question:
“What shape is this object?”
That makes scanning useful when you do not have the original CAD file. It is especially helpful for old parts, handmade items, organic shapes, props, sculptures, and objects with curves that are hard to measure manually.
3D Printing Turns Digital Models Into Physical Parts
3D printing does the opposite. It takes a digital file and builds a real object layer by layer. NIST describes additive manufacturing as a process that fabricates parts from digital designs by building them up layer by layer.
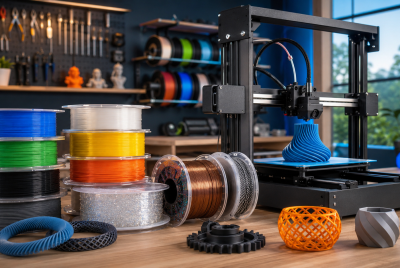
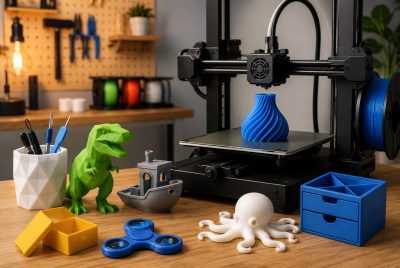
For hobbyists, the most common method is FDM printing. It uses melted filament such as PLA, PETG, ABS, TPU, or nylon. Resin printers are also popular when you need finer details.
If you are still choosing materials, this guide to 3D printing filaments is a helpful next read because material choice affects strength, flexibility, heat resistance, and surface finish.
Why These Two Technologies Work So Well Together
3D scanning and 3D printing work well together because each one solves the other’s biggest limitation.
3D printing needs a model before you can print anything. If no model exists, you either design one from scratch or scan the object. Scanning helps you build from an existing shape instead of starting from zero.
3D scanning, on the other hand, creates a digital copy. That copy becomes more useful when you can repair, modify, or reproduce it with a printer.
Together, they support a scan-to-print workflow. You capture an object, clean the file, adjust the design, print it, test it, and improve it.
That workflow is useful for:
- Replacing broken plastic parts
- Creating custom-fit accessories
- Duplicating handmade pieces
- Making props and cosplay parts
- Designing product prototypes
- Checking printed parts against original objects
- Preserving old or rare items digitally
The real value is not just copying. It is improving. You can scan a part, reinforce weak areas, add mounting holes, resize it, or redesign it for better printing.
The Basic Workflow: From Scan to Finished Print
A successful scan-to-print project follows a clear process. If you skip steps, you may end up with rough surfaces, poor fit, or failed prints.
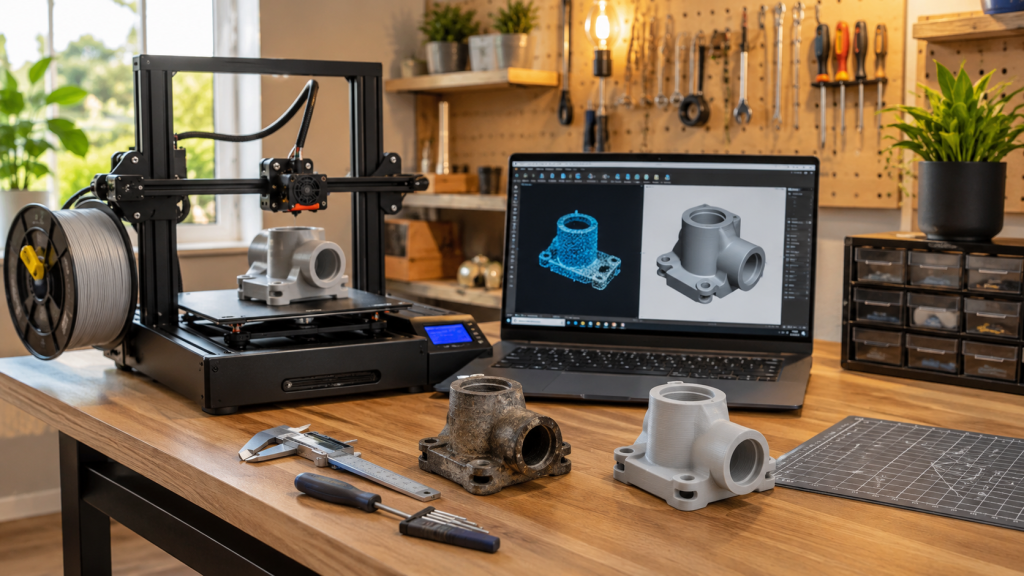
Step 1: Scan the Object
Start with the cleanest scan possible. Place the object on a stable surface and use even lighting. Try to avoid shiny, transparent, or very dark surfaces because many scanners struggle to capture them clearly.
For small objects, a turntable can help. It creates smoother movement and reduces missed areas.
If the scanner loses tracking, use reference markers or scan in smaller sections. For complex shapes, capture several angles and merge them later.
The cleaner the scan, the easier the model is to fix and prepare.
Step 2: Clean Up the Mesh
Most scans need cleanup before printing. They may include holes, rough edges, floating fragments, or unwanted background geometry.
Mesh cleanup often includes:
- Removing extra scan data
- Filling holes
- Smoothing rough areas
- Aligning multiple scans
- Reducing file size
- Fixing non-manifold geometry
Tools like Meshmixer, Blender, Fusion, Geomagic, or scanner-specific software can help. The goal is to create a watertight model your slicer can read.
This step matters because the printer only follows the file. If the mesh has errors, the print may come out warped, incomplete, or impossible to slice.
Step 3: Edit or Repair the Model
After cleanup, decide whether you want an exact copy or an improved version.
For decorative objects, a cleaned mesh may be enough. For mechanical parts, you may need CAD editing. This is where reverse engineering can make the design more practical.
You might need to:
- Rebuild flat surfaces
- Measure hole spacing
- Add tolerance
- Thicken weak walls
- Remove scanning noise
- Turn organic shapes into cleaner CAD features
At this stage, raw scan data becomes a usable design.
Step 4: Slice the File
Once the model is ready, export it to your slicer. Popular options include Cura, PrusaSlicer, Bambu Studio, and OrcaSlicer.
Choose settings based on the part’s purpose. A display model may need a fine layer height and lower infill. A functional part may need thicker walls, higher infill, and a stronger filament.
Also, check the print orientation. Layer direction affects strength, especially on clips, brackets, hinges, and load-bearing parts.
Step 5: Print, Test, and Adjust
Treat the first print as a test. Check the fit, dimensions, strength, and surface quality.
If the part is too tight, adjust the tolerance, and if it warps, improve bed adhesion or switch materials. If details look soft, reduce the layer height or consider resin printing.
This test-and-adjust process is normal. Even experienced makers rarely get every scan-to-print project perfect on the first try.
Common Uses for 3D Printing and 3D Scanning
3D printing and 3D scanning are useful for both hobby projects and professional work. Together, they make it easier to copy, improve, repair, and test real-world objects.
Reverse Engineering Replacement Parts
If a small part breaks and no replacement is available, you can scan the original, repair the model, and print a new version. This works well for simple parts like knobs, clips, covers, brackets, handles, and mounts. However, use caution with parts exposed to heat, heavy stress, or safety risks.
Custom Fit Parts
Scanning helps when a printed part needs to match a real object. You can scan a tool handle, helmet, enclosure, or uneven surface, then design a part that fits around it. This is useful for cosplay, product design, automotive interiors, workshop jigs, and ergonomic accessories.
Prototyping and Product Design
Designers can scan a handmade model, foam mockup, or existing product shell. Then they can refine the design digitally and print improved versions. This saves time because you do not have to start every model from scratch.
Restoration and Preservation
Scanning can help preserve old objects, vintage parts, sculptures, and handmade items. Once scanned, the digital model can be stored, repaired, or printed as a copy. The printed version can be used for handling, display, or replacement while the original stays protected.
Quality Control
You can scan a finished print and compare it with the original model. This helps spot warping, shrinkage, surface issues, or sizing errors. For serious makers, scanning becomes more than a copying tool. It also helps check print accuracy.
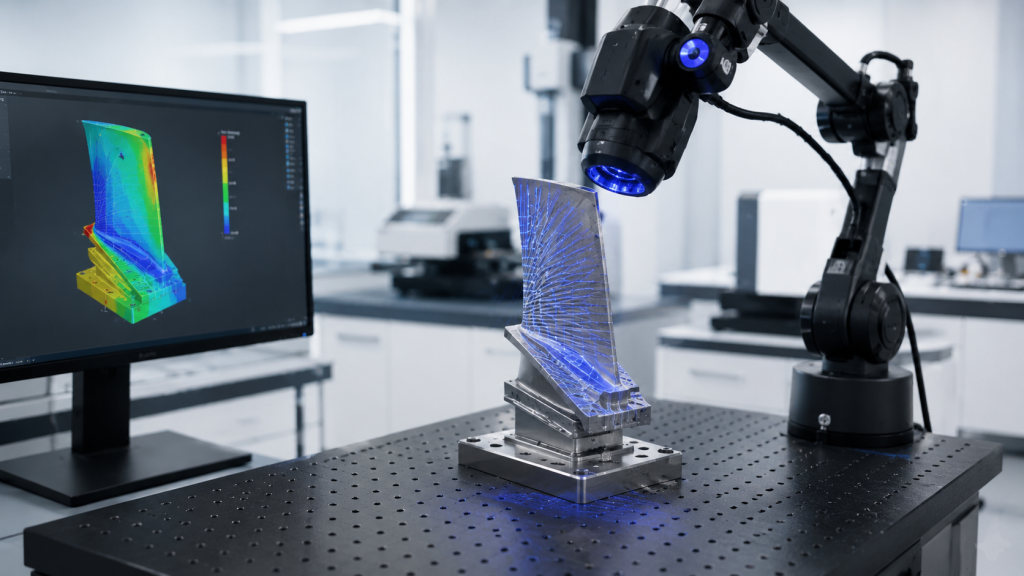
Accuracy Matters More Than Most Beginners Think
Not all scanners produce the same level of detail. A 2024 study comparing several scanning methods found that structured-light scanning and handheld laser scanning captured finer geometry more accurately than lower-cost options such as basic LiDAR and RGB-D scanning.
That does not mean phone scanning is useless. It can work well for large, simple shapes. However, if you need a snap-fit part, gear housing, small mechanical piece, or precise replacement, scanner accuracy matters a lot.
Printer accuracy matters too. Even a perfect scan can fail if your printer has poor calibration, wet filament, bad bed leveling, or loose belts.
For better results, check:
- Scanner resolution
- Object surface finish
- Calibration
- Mesh quality
- Printer dimensional accuracy
- Filament condition
- Slicer tolerances
- Cooling and shrinkage
Small errors add up. A scan that is off by 0.5 mm and a print that shrinks slightly may create a part that looks right but does not fit.
Best Tools for 3D Scanning and 3D Printing
Here are five useful products for building a smoother 3D scanning and 3D printing workflow.
1. Creality CR-Scan Ferret Pro 3D Scanner
The Creality CR-Scan Ferret Pro is a good option for hobbyists who want a dedicated scanner without jumping straight into industrial pricing. It supports full-color scanning and is useful for medium objects, props, models, and general reverse engineering projects.
2. Shining 3D Einstar Handheld 3D Scanner
The Shining 3D Einstar handheld scanner suits makers who want stronger scanning performance for body scans, larger objects, and detailed surface capture. It is a more serious tool for enthusiasts who scan often.
3. Creality Turntable for 3D Scanner
A turntable makes small-object scanning much easier. The Creality 3D scanner turntable gives the scanner a smoother view around the object, which helps reduce missed areas and awkward hand movement.
4. SUNLU Official Filament Dryer S2
Wet filament can ruin an otherwise good scan-to-print project. The SUNLU Official Filament Dryer S2 helps keep PLA, PETG, ABS, and other filaments dry before printing. This is especially useful for functional parts where layer quality matters.
5. Polymaker Panchroma PLA Filament
For clean prototypes, test prints, and decorative scan replicas, Polymaker Panchroma PLA filament is a solid everyday material. It is easy to print and works well when you want to test scanned models before moving to tougher filaments.
Conclusion
3D printing and 3D scanning work together because they create a complete loop: capture, edit, print, test, and improve. Scanning helps you start from a real object instead of designing from scratch, while printing lets you turn that digital copy into a useful physical part. The best results come from clean scans, careful mesh repair, smart material choices, and realistic expectations. Once you understand the workflow, you can use both tools for repairs, prototypes, custom parts, replicas, and better design experiments.
FAQs
1. Can you 3D scan an object and print it directly?
Sometimes, but not always. Simple decorative objects may print after basic cleanup. Functional parts usually need mesh repair, scaling, tolerance adjustments, and sometimes CAD remodeling before printing.
2. What file format do I need for 3D printing after scanning?
STL is the most common format for 3D printing. OBJ and PLY files are also common, especially when color or texture data matters. Your slicer will determine which format works best.
3. Is a phone scanner good enough for 3D printing?
A phone scanner can work for large, simple objects or rough models. For precise replacement parts, small details, or mechanical fit, a dedicated structured-light or laser scanner usually gives better results.
4. What is the best filament for scanned replacement parts?
PETG is a strong everyday choice for many replacement parts because it is tougher than PLA and easier to print than ABS. PLA is a good choice for test prints, concept models, and decorative pieces. ASA, ABS, nylon, or TPU may be better for specialized uses.
5. Why does my scanned 3D print not fit the original part?
The issue may come from scanner accuracy, mesh cleanup errors, printer calibration, material shrinkage, or missing tolerances. Measure the original part, check the scan scale, and print a small test section before making the final version.