How to Smooth 3D Prints With Sanding and More
If your 3D print looks rough, the layer lines are usually the first thing you notice. Learning how to smooth 3D prints helps turn those uneven surfaces into cleaner, more polished pieces. In this guide, you’ll learn simple methods like sanding, filler primer, epoxy coating, and vapor smoothing so your prints look sharper and more professional.
Why 3D Prints Need Smoothing
Most 3D prints come off the bed with visible layer lines. That happens because FDM printers build objects one layer at a time. Even with a dialed-in printer, those stacked lines remain visible.
Smoothing helps when you want:
A cleaner display model
A better cosplay prop
A paint-ready surface
A more professional prototype
A part that feels nicer in the hand
Less visible support damage
However, not every print needs heavy smoothing. Functional parts often work fine straight from the printer. But if appearance matters, post-processing makes a huge difference.
The trick is choosing the right method for your filament. Different materials, like PLA, ABS, PETG, and resin, react differently to smoothing methods.
How Smoothing Improves Print Quality
Smoothing 3D prints is not just about looks. It can also improve surface feel, reduce visible layer lines, and prepare the print for paint or display.
Here’s what the research shows:
- Vapor smoothing can improve surface finish.
A review on vapor polishing for FDM 3D printed parts found that vapor smoothing can reduce rough surfaces caused by layer lines and stair-stepping. This method is especially effective for ABS models. - Too much vapor smoothing can cause problems.
The same review also noted that long solvent exposure may affect fine details, part strength, and dimensions. So, vapor smoothing works best when used carefully. - Sanding can also improve print quality.
A study on post-processing techniques for FDM prints found that sanding improved surface roughness by 3% to 25%. This supports sanding as a simple, low-cost way to reduce layer lines.
In short, smoothing works best when you match the method to the material. Use sanding, filler primer, or epoxy for PLA. Use acetone vapor smoothing mainly for ABS. Either way, go slowly so you do not remove details or change the shape of the print.
Best Tools and Supplies for Smoothing 3D Prints
A few basic tools can help you remove layer lines, clean rough edges, and prepare the surface for paint.
- Sandpaper: Removes layer lines and rough spots. Start with low grit, then move finer.
- Needle files: Smooth tight corners, holes, grooves, and small details.
- Flush cutters: Remove supports, brims, and extra plastic cleanly.
- Hobby knife: Trims stringing, rough edges, and support marks.
- Filler primer: Fills tiny layer lines and creates a smoother paint base.
- Spot putty: Fills deeper gaps, seams, dents, and support scars.
- Plastic-safe paint: Adds color after sanding and priming.
- Respirator or dust mask: Protects you from sanding dust and spray fumes.
- Nitrile gloves: Protects your hands when using primer, paint, epoxy, or alcohol.
- Microfiber cloth: Wipes away dust before painting or coating.
- Epoxy coating: Adds a smooth, glossy finish to props and display prints.
- Isopropyl alcohol: Cleans the surface before primer, paint, or coating.
- Small sanding blocks: Keep flat surfaces even while sanding.
For most hobbyists, sandpaper and filler primer are the best starting point.
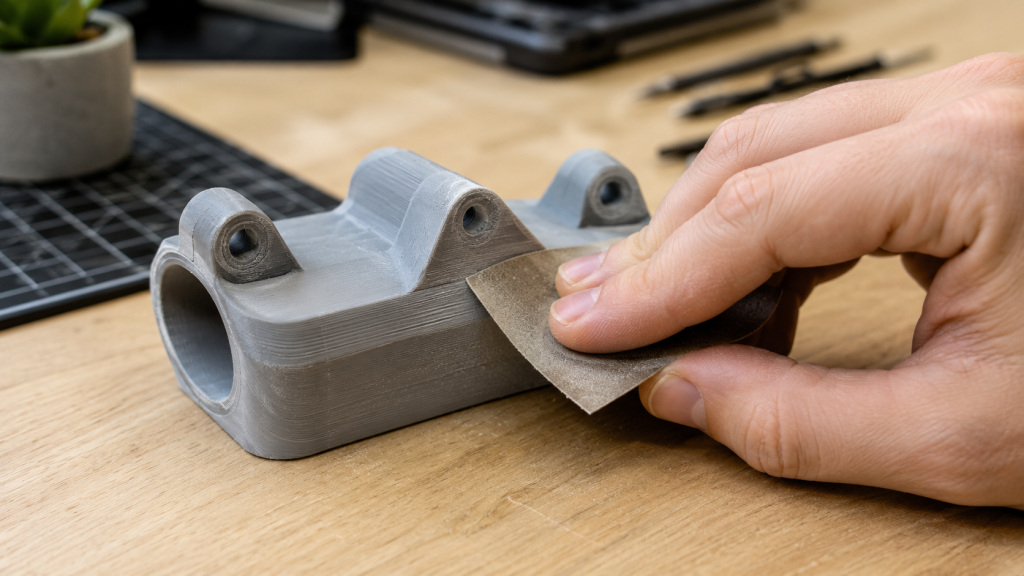
How to Smooth 3D Prints With Sanding
Sanding is one of the easiest ways to smooth 3D prints. It works well on PLA, ABS, PETG, and other common filaments.
The key is to start with a lower grit and move gradually to finer grits. Do not jump straight from rough sandpaper to very fine sandpaper. That can leave scratches and uneven spots behind.
A simple sanding progression looks like this:
- 120 or 180 grit: Removes rough layer lines, blobs, and support marks.
- 220 grit: Evens out the surface after the first sanding pass.
- 400 grit: Prepares the print for filler primer or paint.
- 800 to 1000 grit: Creates a smoother finish before the final coat.
Wet sanding can also help after primer. It reduces dust and gives the surface a cleaner feel. However, avoid soaking prints with gaps, weak infill, or poor layer adhesion.
Step-by-Step Sanding Method
- Remove supports first. Use flush cutters or a hobby knife to clean up support marks, brims, and stringing.
- Start with rough areas. Sand visible layer lines, blobs, and support scars with 120 or 180 grit.
- Move to 220 grit. This helps smooth the surface and remove deeper scratches.
- Apply filler primer if needed. Let it dry fully before sanding again.
- Use 400 to 800 grit sandpaper for wet sanding. Use light pressure until the surface feels smooth.
- Finish with paint or clear coat. Once the surface looks even, you can paint or seal the print.
Take your time with this step. Sanding may feel slow, but it makes the biggest difference in the final look of your 3D print.
Using Filler Primer for a Cleaner Finish
Filler primer helps hide small layer lines, tiny gaps, and light surface flaws. It works especially well on PLA prints because PLA usually needs sanding and coating instead of chemical smoothing.
For the best result, spray several light coats instead of one heavy coat. A thick coat can drip, cover fine details, or leave a sticky surface.
Use this simple process:
- Clean the print: Wipe away dust, oils, and loose plastic.
- Spray a light coat: Hold the can at a steady distance and apply an even layer.
- Let it dry fully: Follow the drying time on the can.
- Sand with 400 grit: Smooth the surface gently.
- Repeat if needed: Add another coat if layer lines still show.
- Complete the model by painting it or adding a clear protective finish.
Filler primer works well for helmets, props, display models, miniatures, and decorative prints.
If your print has deep gaps or dents, use spot putty first. Apply a thin layer, let it dry, then sand it smooth before adding primer.
How to Smooth PLA 3D Prints
PLA usually prints without much trouble, but getting a clean surface takes a bit more work. Unlike ABS, standard PLA does not smooth well with acetone. That means your best options are sanding, primer, putty, epoxy, and paint.
The best ways to smooth PLA include:
- Sanding: Removes visible layer lines and rough spots.
- Filler primer: Fills small lines and creates a smoother paint base.
- Spot putty: Fixes deeper seams, dents, and support marks.
- Epoxy coating: Adds a smooth, glossy outer layer.
- Paint and clear coat: Gives the print a polished final look.
For most PLA prints, follow this order:
- Sand the print first.
- Apply filler primer.
- Sand again after it dries.
- Paint the surface.
- Add a clear topcoat to protect the final surface.
Be careful with heat guns on PLA. PLA softens faster than many other filaments, so too much heat can bend thin parts, warp edges, or ruin small details.
For a safe and beginner-friendly method, stick with sanding, filler primer, and paint.
How to Smooth ABS Prints With Vapor Smoothing
ABS can be smoothed with acetone vapor. The acetone slightly softens the outer layer of the print, which helps reduce layer lines and creates a glossy finish.
However, this method needs extra care. Acetone is flammable, and the fumes can be harmful. Always work in a well-ventilated area, wear proper protection, and keep acetone away from flames, sparks, and heat.
ABS vapor smoothing is best for:
- Decorative parts
- Cosplay props
- Display models
- Simple shapes
- Glossy finished pieces
It may not be the best choice for mechanical parts. Vapor smoothing can soften sharp edges and slightly change the size of the print. If your part needs tight measurements, sanding or light finishing may be safer.
Use short exposure times and test the process on a failed print first.

Epoxy Coating for Strong, Glossy Prints
Epoxy coating adds a smooth outer layer to a 3D print. It can hide layer lines, add shine, and make the surface feel more finished.
The process is simple:
- Clean the print.
- Brush on a thin epoxy coat.
- Let it self-level.
- Allow it to cure fully.
- Sand or paint after curing if needed.
Epoxy works well for:
- Cosplay armor
- Helmets
- Vases
- Display props
- Large decorative prints
The main downside is detail loss. A thick coat can cover fine textures, small grooves, and sharp edges. For detailed models, use a very thin coat or choose sanding and primer instead.
Always wear gloves, protect your workspace, and follow the product instructions. For an easy starting point, try these beginner 3D printing projects before moving on to more advanced smoothing techniques.
Heat Smoothing: Useful but Risky
A heat gun can help remove stringing and soften tiny surface flaws. However, it is not the best method for full smoothing.
Too much heat can quickly damage your print. It may:
- Warp the model
- Melt small details
- Create shiny uneven spots
- Bend thin walls
- Damage overhangs
If you use heat, keep the heat gun moving and use short passes. Move the heat source in steady passes to prevent warping.
Heat smoothing works best for quick cleanup, not deep layer-line removal. For PLA, be extra careful because it softens at lower temperatures than many other filaments.
Recommended Products for Smoothing 3D Prints
1. 3M Wetordry Sandpaper Assortment
A sandpaper assortment gives you multiple grits for rough sanding, fine smoothing, and wet sanding. It is a must-have for anyone learning how to smooth 3D prints.
2. Rust-Oleum Automotive Filler Primer
This is a popular choice for filling layer lines before painting. It works well on PLA props, helmets, and decorative prints.
3. Bondo Glazing and Spot Putty
Spot putty helps fill deeper print lines, seams, small gaps, and support scars. Use it before primer for a cleaner final surface.
4. XTC-3D High Performance 3D Print Coating
This epoxy coating is designed for smoothing 3D prints. It adds a glossy shell and helps hide visible layer lines.
5. 3M Half Facepiece Reusable Respirator
Sanding and spraying create dust and fumes. A proper respirator helps protect you during post-processing, especially when using primer, paint, or solvents.
Conclusion
Learning how to smooth 3D prints gives your projects a cleaner, more finished look without needing expensive tools or advanced skills. Sanding, filler primer, spot putty, epoxy, and vapor smoothing all have their place, but the best method depends on your filament, print details, and final goal. For most PLA prints, sanding and filler primer offer the safest and easiest starting point, while ABS prints can benefit from careful vapor smoothing. The key is to work slowly, use light layers, protect yourself from dust and fumes, and test your process before finishing an important model. With the right approach, even a rough print can become something polished, paint-ready, and worth showing off.
FAQs
1. What is the easiest way to smooth 3D prints?
The easiest method is sanding followed by filler primer. This works well for PLA, ABS, PETG, and many common FDM prints.
2. Can you smooth PLA with acetone?
No, acetone does not smooth standard PLA the way it smooths ABS. For PLA, use sanding, filler primer, spot putty, epoxy, or paint.
3. What grit sandpaper should I use for 3D prints?
Start with 120 or 180 grit for rough lines, then move to 220, 400, and 800 grit for a smoother finish.
4. Do I need filler primer for 3D prints?
You do not always need it, but filler primer makes a big difference if you plan to paint the print. It fills small layer lines and creates a smoother surface.
5. Is vapor smoothing safe?
Vapor smoothing can be effective for ABS, but it involves chemicals and fumes. Use ventilation, protective gear, and follow safety guidelines carefully.