3D Printer Troubleshooting for Common Problems
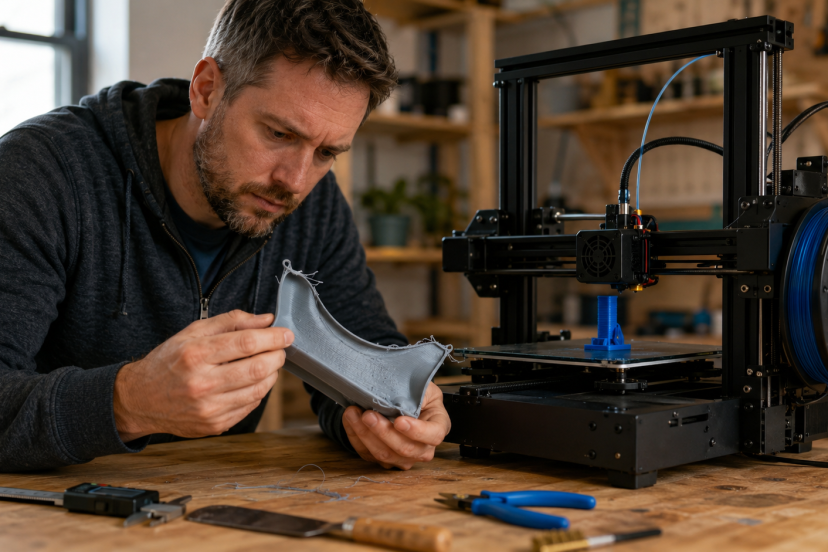
A failed print leaves clues: a loose first layer, thin walls, wispy strings, shifted layers, or extruder clicking. Good 3D printer troubleshooting means reading those clues and changing one variable at a time. This guide focuses on FDM printers, which melt filament through a nozzle. Begin with basic troubleshooting before replacing any components. Confirm the printer and filament profile, inspect the machine, and print a small test model.
Start Your 3D Printer Troubleshooting With the Symptom
Before touching the controls, record the material, nozzle size, temperatures, layer height, speed, and exact point of failure. Then ask three questions:
- Did the problem begin on the first layer or later?
- Does it affect material flow, machine movement, or both?
- Did the same file print correctly before?
Try a known calibration model with a standard slicer profile. If it also fails, inspect the printer or filament. If it succeeds, review the original model and settings.
Fix First-Layer and Bed-Adhesion Problems
A print cannot recover from a poor foundation. Clean the cool build plate according to its manufacturer’s directions. Skin oil, dust, and old adhesive can prevent even a level bed from holding PLA.
Next, level or mesh the bed and set the Z-offset. If the lines remain rounded and do not merge, the nozzle is likely too far from the bed. A rough, nearly transparent layer or a nozzle scraping the plate means it sits too low. The goal is a continuous line with a gentle, even squish. Prusa’s first-layer calibration guide illustrates this relationship clearly.
Confirm the bed temperature, slow the first layer, and avoid drafts. Use a brim for narrow contact points. Treat glue as an aid—not a cure for poor leveling.
Diagnose Under-Extrusion, Clogs, and Extruder Clicking
Under-extrusion creates gaps, weak walls, or missing lines. Extruder clicking often means the drive gear cannot push filament through the hotend.
Work from the spool toward the nozzle. Make sure the filament is not tangled and can move through its path. Inspect the drive gear for plastic dust, check idler tension, and confirm that the hotend reaches a suitable temperature for the material. Printing too cool or too fast can demand more flow than the hotend can supply.
Warm the nozzle, then feed a small amount of filament through it manually. A clean strand should leave the nozzle smoothly. If it curls sharply, sputters, or barely flows, follow your printer maker’s unclogging procedure. A cold pull can remove burnt material from a partial blockage, as explained in Prusa’s cold-pull maintenance instructions. Do not copy temperatures or disassembly steps from another hotend; designs differ.
Moist filament may hiss, pop, or produce an uneven strand. Dry it at the filament maker’s recommended temperature, then store it sealed with desiccant. For material-specific temperature and handling advice, see our guide to choosing 3D printing filament.
Reduce Stringing, Blobs, and Rough Surfaces
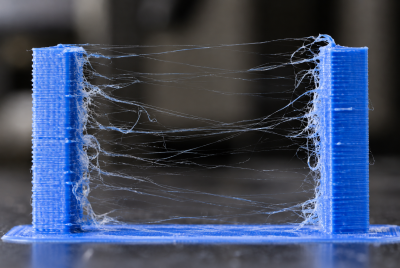
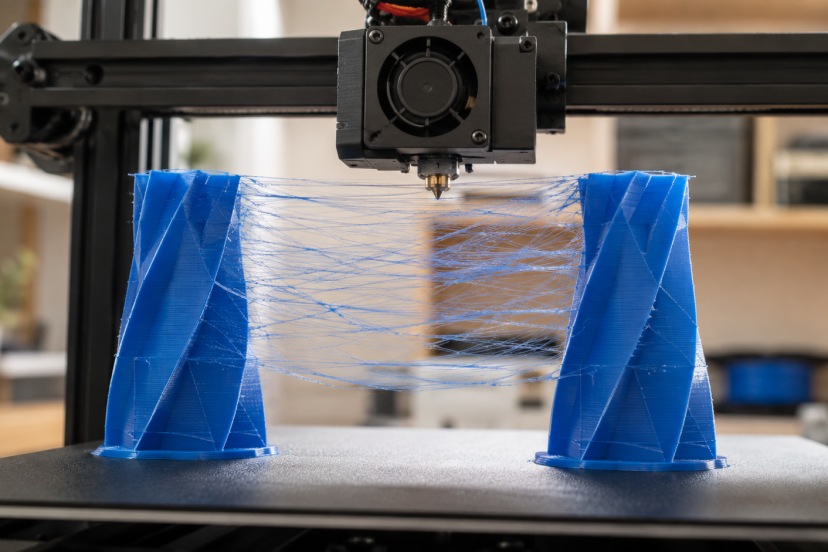
Stringing appears when molten plastic leaks during travel moves. Begin by drying the filament and using the material maker’s temperature range. Then print a temperature tower. Excess heat lowers viscosity and often increases oozing.
After temperature, tune retraction in small steps with a short test. Direct-drive and Bowden extruders need different distances, so use a trusted baseline for your machine. Avoid large jumps; too much retraction can encourage clogs. Prusa’s stringing and oozing guide also recommends checking temperature, retraction, and filament moisture.
Blobs can come from damp filament, unstable extrusion, excessive flow, or seams. Verify the filament diameter, calibrate extrusion, and clean the cold nozzle exterior. For ringing near corners, lower acceleration or outer-wall speed and check belt tension.
Stop Warping, Layer Separation, and Weak Prints
Warping occurs when cooling plastic contracts unevenly and lifts from the plate. Clean and calibrate the bed first. Next, use the proper bed temperature, add a brim, shield the printer from drafts, and consider an enclosure for materials that need a stable warm environment. Never enclose electronics unless the printer manufacturer allows it.
Weak layers often point to low nozzle temperature, excessive cooling, too much speed, or an unsuitable print orientation. Raise temperature in small increments within the filament maker’s range and slow down. Add perimeters when the part needs strength, and orient the layer lines around the expected load.
UltiMaker’s detailed review of 3D printing quality factors connects warping with uneven cooling and identifies clogs, flow settings, feed problems, and temperature as common under-extrusion causes. Those are useful principles across many FDM machines.
Correct Layer Shifts and Dimensional Errors
A sudden sideways step usually signals lost motion. Turn off and unplug the printer before mechanical inspection. Check that belts are firm but not overtightened, pulleys do not slip on motor shafts, cables move freely, and the toolhead or bed travels without binding.
If mechanics look sound, reduce speed and acceleration. Also check whether the nozzle struck curled plastic or infill. Persistent shifts may involve a motor, driver, wiring, or overheating issue that needs model-specific support.
For inaccurate dimensions, do not scale the model immediately. Verify belts, nozzle size, flow, first-layer squish, and filament diameter. Measure a cooled calibration part, then adjust only the relevant compensation.
If you are still learning the workflow, review how 3D printing works and what beginners need first. It gives the calibration steps below more context.
Five Products for 3D Printer Troubleshooting
These tools cover common diagnosis and maintenance tasks. Check compatibility and current listing details before buying.
1. SOVOL 36-Piece 3D Printer Tool Kit
The SOVOL 36-piece tool kit combines a digital caliper, cutters, files, brushes, tweezers, scrapers, and deburring tools. It suits a new workbench and reduces the need to buy basic finishing tools separately.
2. SUNLU S2 Filament Dryer
The SUNLU S2 filament dryer heats one spool and lets you print while drying. It can help when moisture causes popping, rough surfaces, weak extrusion, or persistent stringing. Always follow the filament maker’s drying limits.
3. ORNITIC 64-Piece 3D Printer Tool Kit
The ORNITIC 64-piece kit includes cleaning needles, brushes, a scraper, cutters, files, and support-removal tools. It is useful for nozzle care and post-processing, though cleaning needles must match the nozzle opening and should never be forced.
4. iGaging Absolute Origin Digital Caliper
The iGaging 0–6-inch digital caliper helps measure calibration parts, filament, holes, and finished dimensions. A caliper turns vague impressions such as “slightly too large” into data you can compare after each controlled adjustment.
5. ENOMAKER 3D Printer Bed Adhesive
The ENOMAKER bed adhesive is designed to improve hot-bed grip for several common filaments. Confirm that it suits your build surface. Some materials need an adhesive mainly as a separating layer, and some plates work best without it.
Use a Repeatable Troubleshooting Routine
Save a baseline profile that already works. When a defect appears, change one setting, label the test, and note the result. Small towers, cubes, and first-layer patches make faster diagnostic prints than a full model.
If a problem follows one spool, suspect material or moisture. If it follows every spool, inspect calibration and hardware. If it appears only in one model, review mesh errors, wall thickness, orientation, supports, and travel paths. This simple isolation method makes 3D printer troubleshooting far more predictable.
Conclusion
Successful 3D printer troubleshooting starts with observation and controlled tests. Fix the first layer before chasing later defects, trace extrusion problems from spool to nozzle, and inspect mechanics before compensating in software. Above all, adjust only one setting at a time. Your notes will soon become a reliable profile for your printer, filament, and workspace—and failed prints will become useful clues instead of expensive mysteries.
FAQs
Why does my 3D print fail at the same height?
Look for binding on the Z-axis, a cable snag, damaged model geometry, heat creep, or a slicer error. Reslice the model and test a simple tall object. A failure at the same machine height suggests hardware; failure at the same model feature suggests the file or toolpath.
Why is filament not coming out of the nozzle?
The nozzle may be too cool, clogged, or too close to the bed. The spool may also be tangled, or the drive gear may be slipping. Raise the nozzle away from the plate, heat it correctly, and test manual extrusion before disassembly.
What causes a 3D printer to click?
Clicking usually means the extruder cannot advance filament. Common causes include a blockage, low nozzle temperature, excessive speed, incorrect idler tension, or resistance in the filament path.
Should I level the bed before every print?
Not necessarily. A stable machine can retain calibration through many prints. Recheck the bed after moving the printer, changing the nozzle or plate, working on the toolhead, or seeing an uneven first layer.
When should I replace the nozzle?
Replace it when cleaning does not restore steady flow, the opening looks damaged, or abrasive filament has enlarged it enough to harm accuracy. Install the correct type and follow the printer maker’s hot-tightening and safety procedure.